Klipper Camera, Light Bar and 32GB EMMC - The Best Unbox Setup You Should Do
The KINGROON KLP1, one of the most affordable Core-XY 3D Printer with Klipper firmware installed, has been improved a lot and now comes to its third version. It starts to use a brand-new extruder kit, who has a 9.5:1 gear ratio, and a whole new set of mainboard, THR board, THR cable and a CHC heating ring. Also, the print volume is now 230x230x210, cam print much larger objects now.
Recently we shared tutorial about Klipper Timelapse - Installation and Configuration, Klipper AI with Obico - Best Upgration for Your Klipper Printers, and the Klipper Mainboard - KINGROON KP Cheetah Mainboard. If you recently got the model, adding a light bar, a webcam and a 32GB EMMC during the setup is a great idea, so you can enjoy the time lapse video and AI detection directly after its setup.
The Light Bar
The light bar on a 3D printer can help you in many ways, especially for time lapse video taking and AI detection. For a core XY 3D printer with enclosure like KLP1, the light bar can help you observe the prints when printing ABS. Also, the environment light is no longer a problem, just turn off the light when you leave, the light bar takes care of your prints.
Once you removed all the 3 screws, have all the axis released, we can start the setup process. Find a right position on the right side, beneath the belt a little bit will be good, tear off the stick cover on the light bar, then put in on the inner wall. Then the light bar is totally fixed. It has a strong stick, you must make sure the position is good.
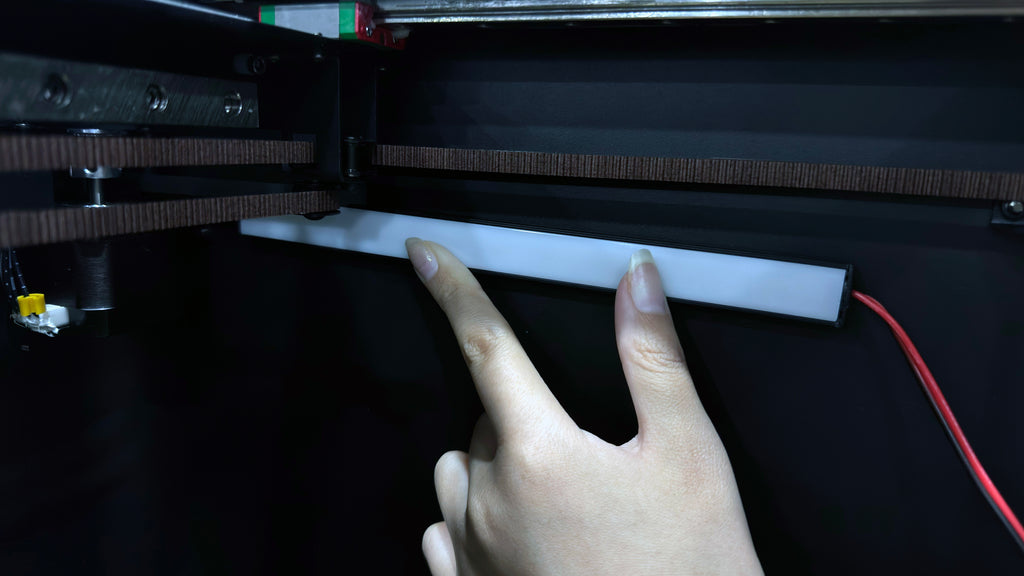
After that, you can find a hole on the front right corner, put the light bar cable in. Then you will be able to connect it to the power supply on its back. Taking power from the mainboard main affect the stability of its work, that why connect the light bar to the power box.
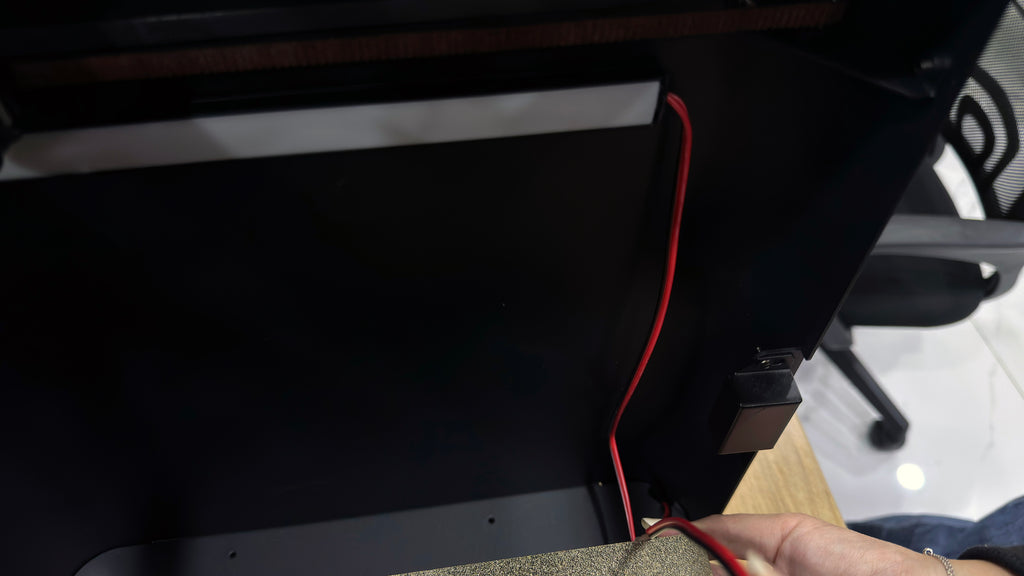
Then turn the printer over and open the bottom cover. Find the light bar cable then connect it to the power supply as the below photo shows.
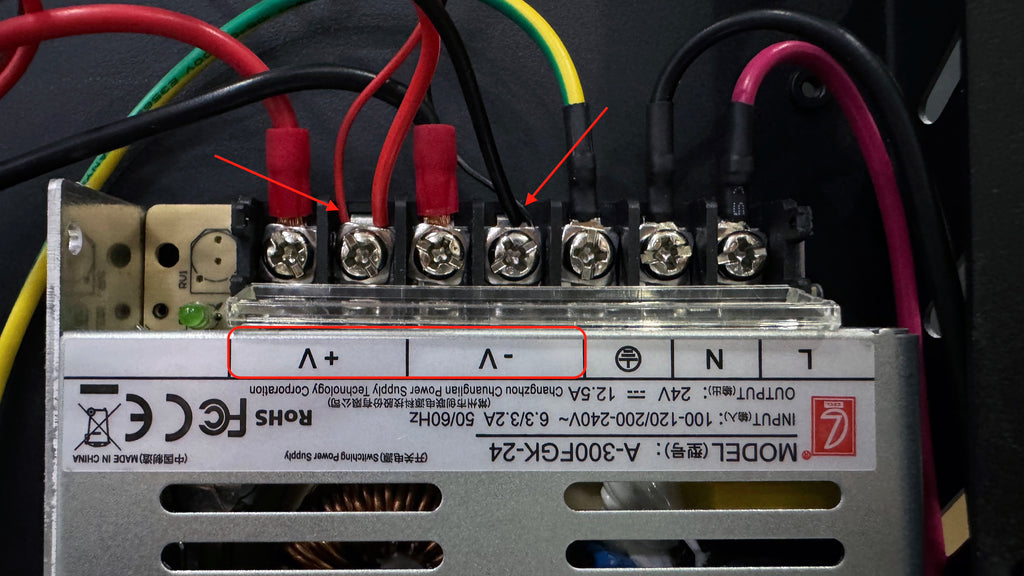
After that, the light bar is all set, it should light up with the printer booting.
24V Light Bar for Kingroon KLP1 3D Printer: https://kingroon.com/products/copy-of-universal-led-light-bar-upgrade-kit-for-bambu-lab-x1-3d-printer
The 32GB EMMC Module
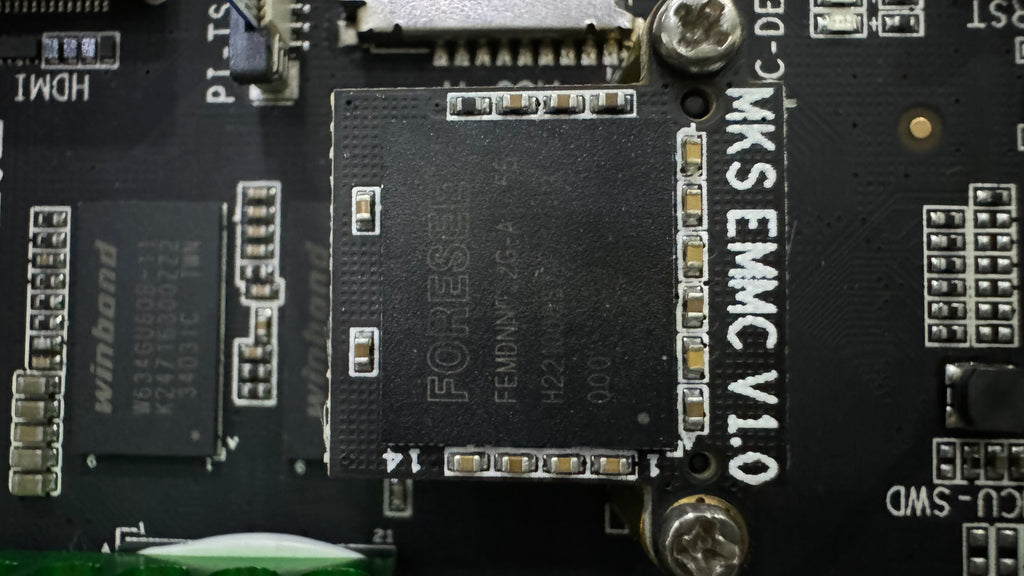
So, the bottom cover is still not back, it’s a good time to have the stock 8GB EMMC module replaced.
Check 32GB EMMC Module Comes, what it is for and what Can we Do with it and have the 32GB EMMC prepared.
Then install the 32GB EMMC Module back on the mainboard.
Then you can put the bottom back.
Upgrade 32GB EMMC Module for KP3S Pro V2 and KLP1:https://kingroon.com/products/upgrade-32gb-emmc-module-for-kingroon-kp3s-pro-v2-and-klp1
The KLP1 Webcam
So, it is the time to install the KLP1 Webcam. It is a USB webcam with 720P resolution, fits KLP1 230 perfectly. For other models, if you can figure out a way to mount it, it is also for your model, it is USB-driver-free.
Let’s start.
Step 1 remove the top cover
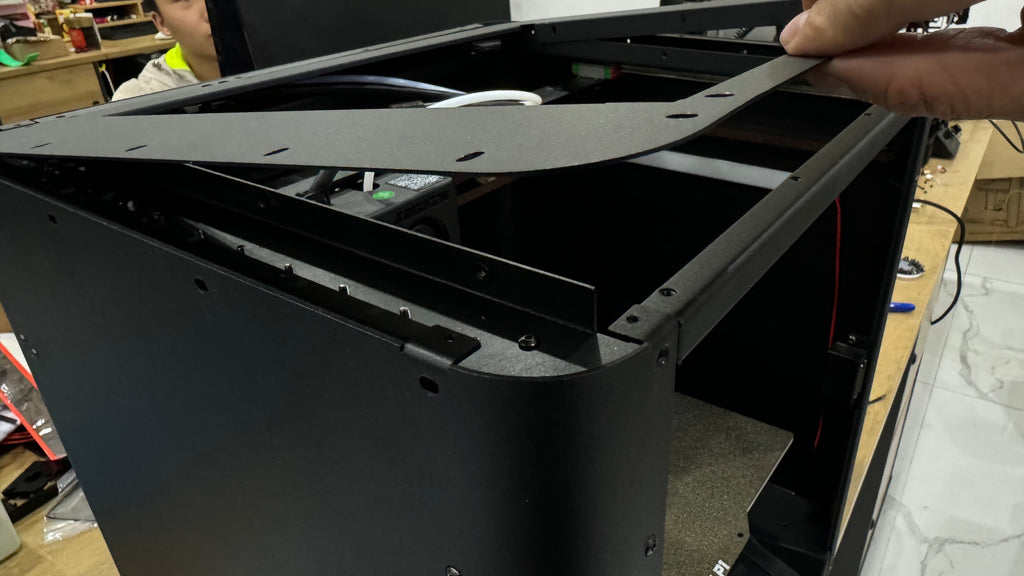
Step 2 Put the Webcam port in through the hole for PTFE tube.

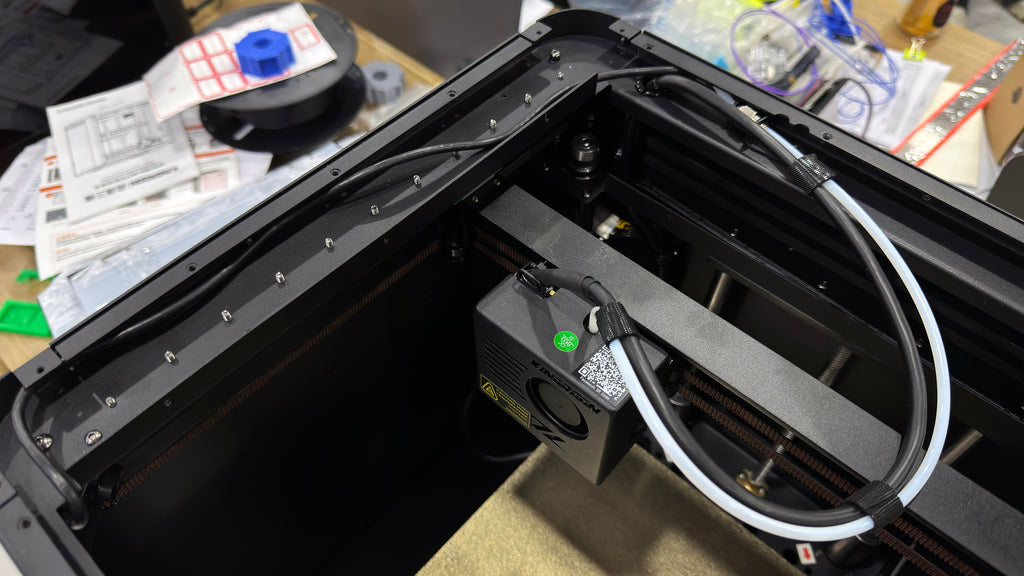
Step 3 Set up the Webcam as the photo does

Step 4 Install the Webcam on the top front left coroner, use the screw to fix it.
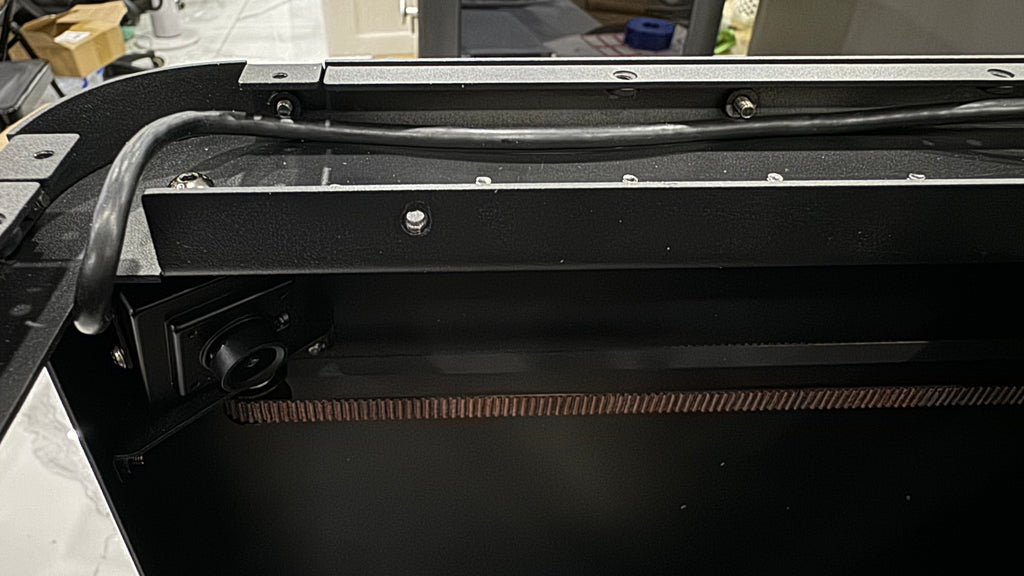
Step 5 Arrange the cable in the ditch, make sure it fit well.
Put the top cover back, then you can set up the printer as the quick start guide shows.
KLP1 Web Cam: https://kingroon.com/products/kingroon-klp1-webcam
Remember to use the code in 32GB EMMC Module Comes, what it is for and what Can we Do with it to use all the 32GB storage, it is important for running Klipper time lapse.
Alright, that’s all for today, happy 3D Printing.
Leave a comment